
A bedroom is someone’s own personal sanctuary. It is where they can be themselves when no one is watching. So it just seems right that it is exactly how they would want it. Here are a few tips and DIYs for all you “prepsters” out there.
Bedroom essentials: Here are a few things that should be in every preppy room.
- A white comforter: Having a white comforter gives you a blank canvas to build color off of with accessories.
- A persian rug: A vintage rug for pizazz.
- A ceramic animal head: Mixing rustic and modern into on accessory. Probably make it a fake head because the look is cute, but you’re not a monster.
- Bright pops of color: Whether it’s with accessories or wall colors, a bit of bright color is necessary to brighten up a room.
- Books and bookends: A way to display your coffee table reads without a table.
- Pendant flags: Cute and sporty wall décor (learn how to make your own in our Buckhead Neighborhood Guide.)
Decorating with what you have: A cheap way to reuse things we love to make new things.
- Sunglass holder: place tacks on the wall to hold your sunglasses. You could also hang chicken wire on your wall and hang your sunglasses off of that.
- Candle holder: After your candle has burnt out, use it to hold pencils, makeup brushes or other things.
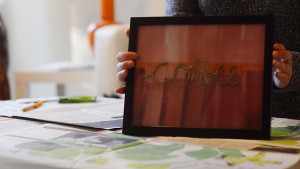
- Framed bags/magazines: Use old gift bags or pages from magazines, cut out a section of it you want and frame it. You can use these framed pictures to create a gallery wall or to just add to your wall.
- Pillow toppers: Instead of setting your pillows straight up and down, lay them down flat like you would when you sleep, but stack them one on top of the other.
- Shoe display: Place your favorite pairs of shoes on a stack of books.
———
Preppy DIYs:
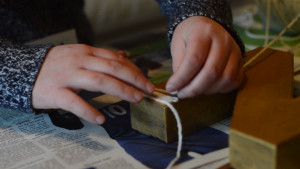
Twine Phrases: A personal message written in twine.
Material: Hot glue, pattern gift bag or paper, pencil, twine, picture frame
Step one: Take the back of the frame and trace then trace it onto the gift bag.
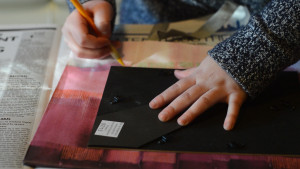
Step two: Cut out the square and write out the phrase you want.
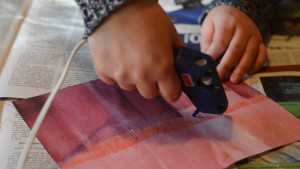
Step three: Take the twine and start to follow the sketch on the paper.
Step four: Start gluing. Place a dot of hot glue where each letter connects on the twine. This will hold the word together. You also want to glue the words onto the square of paper.
Step five: Place the photo into the frame.
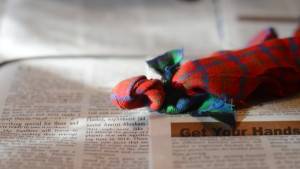
Cloth tassel garland: Garland of a different kind.
Material: Cloth, twine, hot glue.
Step one: lay your cloths out flat and cut into even strips.
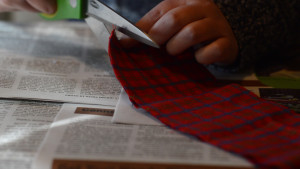
Step two: Fold your stripes in half hamburger style.
Step three: Cut strips from the bottom to the tom. But make sure to leave about an inch at the top. Do not cut the fold.
Step four: Unfold each strip and twist it. You want the center to create a twist and fold it you make a loop in the center.

Step five: Repeat step two and three until you have as many tassels as you want.
Step six: Dab some hot glue to keep the loop intact. Then pull the string through each loop to create the garland.
Revamped letters: Let people know whose room it is.

Materials: Cardboard/ Letter of your name, hot glue, yarn
Step one: Trace a letter onto a piece of cardboard and cut it out. You could also buy a premade letter.
Step two: use hot glue to glue the yarn to the front.
Make your room as classy and as preppy as you want with these tips. Prep for the win.