
People like to believe that the go-to spot for entertaining is the living room, but that isn’t always the case. Most of the time our bodies will force us to migrate to the kitchen, it is the one space in houses that has both seating and food. However, since so much effort goes into making our living rooms look nice for guests, the kitchen will often go ignored. Don’t let your kitchen be decoration-less. Here are a few cute and easy DIYs to make your kitchen be a welcoming spot to hang out in.
~~~~~~~~~~~~~~~~~~~~~~~~~~~~~~~
For the Refrigerator
Bottle Cap Magnets
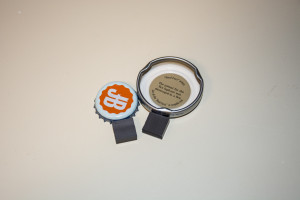
Materials: Beer bottle caps and magnet stickers
Step one: Take off the cap and wipe it out to make sure there is nothing on it. You can either leave the caps in their normal shapes or flatten them out
Step two: Glue the magnet to the back of the cap.
Wine Cork Succulent Magnets
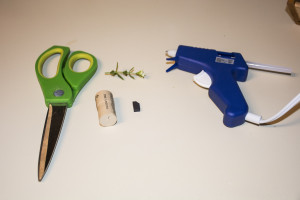
Materials: Wine bottle cork, magnets, knife, plastic succulent pieces
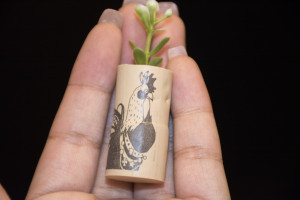
Step one: Use the knife to dig a little hole into the top of the cork.
Step two: Use hot glue to glue the piece of succulent into the hole.
Step three: Glue the magnet to the side of the cork. When you place the cork onto the fridge it should sit upright.
~~~~~~~~~~~~~~~~~~~~~~~~~~~~~~~
For The Counters/ Walls
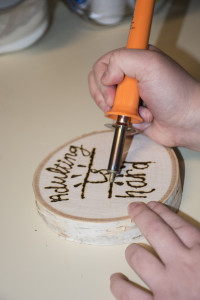
Birchwood Sign
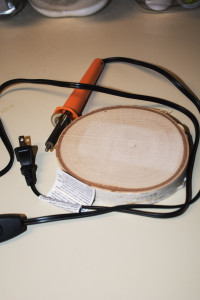
Materials: A Round slices of birch wood, wood burner or paint
Step one: Decide what word or phrase you want in your kitchen and then sketch it out onto the round of wood.
Step two: Use your wood burning tool to carve into the wood or paint over the sketch.
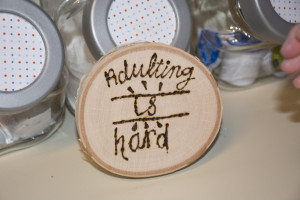
Step three: You can let it sit on the counter or you can glue a loop of string to the back to allow it to hang on the wall.
Bottle wall organizer
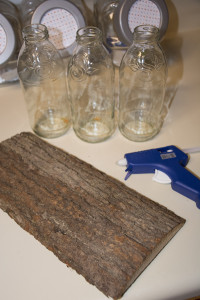
Materials: Glass bottles/ Snapple bottles/ mason jars, hot glue, a knife, a long block of wood
Step one: Wash out glass bottles if they are being reused
Step two: Take the knife and dig two holes into the back of the wood. The holes will allow you to hang it up when you’re done. If you don’t want to drill holes into the back you can glue two loops of string to the back to hang it up.
Step three: Glue as many bottles in a row to the front side of the wood. You can keep them close together or space them out.
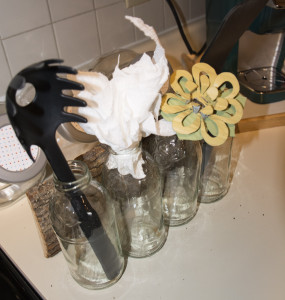
*TIP: This will be a great way to hold napkins, silverware or other utensils. You can also fill the bottles with fake flowers to just make a decoration.
~~~~~~~~~~~~~~~~~~~~~~~~~~~~~~~~~~~~~~~~
For The Oven
Homemade oven Mitt
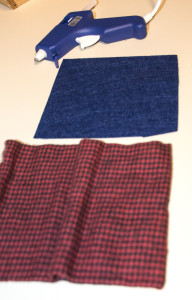
Materials: A 21.5 inches by 18 inches square of fabric (Does not melt), a piece of felt (5 inches by 6.5 inches), hot glue gun
Step one: lay your square of fabric out flat. Fold hot dog style into thirds. Like you would to make a pamphlet. It should be 7 inches by 18 inches. Then glue the folds down.
Step two: fold one end over, hamburger style, to the middle and fold the other side on top of the first one. This should be 6 inches by 7 inches. **Do not glue down yet.
Step three: Before gluing down the previous folds, put the piece of felt under the first hamburger style fold and glue them together.
Step four: Glue down the second hamburger style fold. Tuck the rough edge under the fold.
Step five: Glue together one of the open ends of your fabric square. This will be the top.
Step five: Your glove will have several different layer to it. You want to glue all of the layers together except for the one. The one that should stay unglued will be where your hand goes. So you want the felt and most of the fabric on one side. That will be where your palm faces.
** Tip: You don’t have to have a place for your hand. You can always glue all of the layers and edges together to create one square mitt.
~~~~~~~~~~~~~~~~~~~~~~~~~~~~~~~~~~~~~~~~~~~~~~~
Repurpose
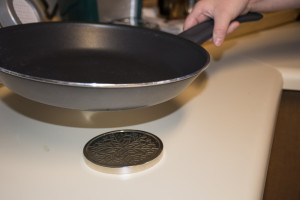
Candle Lid Pot Holder: When you’re cooking with several different pots and pans you can run out of room on the stove to place them. So, when you need to set a hot pan off to the side place it on the metal lid of a large candle. With your pan on a faced down lid, your counter tops don’t have to suffer.
Decorative Coffee Potpourri: Fill a glass vase with ground coffee and place fake flowers or succulents in it. The coffee will act like dirt and make your kitchen smell like a coffee shop.
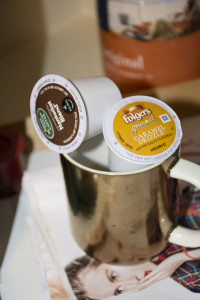
Coffee Cup Holder: Sometimes there is too much stuff and not enough storage. Try placing a cute mug next to your coffee maker and fill it with, sugar packets, stirring sticks or even your K-cups.
Enjoy these DIYs to help pull your kitchen together.